Importance of Safety Rules in Science Lab

This article discusses the importance of safety rules in a science lab. The lab can be a dangerous place where accidents can happen if proper precautions are not taken. Therefore, following general safety precautions such
- Uploaded on | 5 Views
-
 luis
luis
About Importance of Safety Rules in Science Lab
PowerPoint presentation about 'Importance of Safety Rules in Science Lab'. This presentation describes the topic on This article discusses the importance of safety rules in a science lab. The lab can be a dangerous place where accidents can happen if proper precautions are not taken. Therefore, following general safety precautions such. The key topics included in this slideshow are . Download this presentation absolutely free.
Presentation Transcript
Slide1Introduction UnitLab Safety, Variables and Graphing
Slide2Lab Safety Safety rules are important in the science lab because the lab is a dangerous place where accidents can happen.
Slide3General Safety Precautions...• Work quietly and carefully. Never work alone. • Listen carefully to the instructions of your teacher. • Wear protective clothing when requested.
Slide4•Never eat or drink in the lab. • Tie back hair and clothing when requested. Don’t wear loose fitting clothing or jewelry. • Never do lab experiments at home unless requested by your teacher.
Slide5Safety Equipment...1. Fire Extinguisher
Slide62. Chemical Shower
Slide73. Broken Glass Container
Slide84. Fire Blanket
Slide95. Eye and Face Wash
Slide106. First Aid Kit
Slide117. Fume Hood
Slide128. Protective ClothingGloves Goggles Lab Coat/ Apron
Slide13Handling Materials in theLab... 1. Don’t touch anything until told to do so. 2. Waft odors; don’t snarf. 3. Carefully pour liquids away from your body.
Slide144. Wash hands after handlingmaterials and after class. 5. Clean up and dispose of materials as directed by your teacher.
Slide156. If any part of your body comes incontact with a harmful chemical, rinse the area immediately and inform your teacher.
Slide16Before you begin an activity...1. Read the activity carefully. 2. Make sure your work area is cleared of any potential hazards. 3. Don’t begin until instructed to do so. 4. Listen carefully to the instructions of the teacher.
Slide17Handling a Heat Source...1. Use an electric hot plate whenever possible. 2. To heat a test tube on a hot plate, use a water bath.
Slide183. Use only heat-resistant glass. Besure that it is NOT cracked. 4. Always keep the open end of the test tube pointed away from people.
Slide195. Never allow a container to boildry. Use boiling chips. 6. Pick up hot objects using gloves or tongs.
Slide207. Turn off the heat source whenfinished. Put away correctly. 8. Apply cool water to burns immediately.
Slide21WHMIS...• Workplace Hazardous Materials Information System • Used to provide information about a chemical before it is used. How is the chemical dangerous? • There are 8 symbols in WHMIS.
Slide221. Biohazardous Material
Slide232. Compressed Gas
Slide243. Corrosive Material
Slide254. Flammable Material
Slide265. Oxidizing Material
Slide276. Poisonous Material
Slide287. Dangerously Reactive Material
Slide298. Toxic and Infectious Material
Slide30MSDS...• Material Safety Data Sheet • Provides information about the chemical you are using. For example if it is toxic and first aid treatments. • Most MSDS sheets contain 8 common pieces of information.
Slide311. Name of the Chemical2. Dangerous Ingredients 3. Physical Data 4. Fire and Explosion Hazard Data
Slide325. Reactivity Data6. Toxicological Properties 7. Preventive Measures 8. First Aid Measures
Slide33Laboratory Equipment: Some Samples… Balance: used to determine the mass of an object.
Slide34Beaker: used to measure and pourliquids.
Slide35Bunsen Burner: Allows you to heatchemicals.
Slide36Erlenmeyer Flask: Allows you toswirl liquids to mix completely.
Slide37Funnel: Allows the transfer of aliquid from one container to another. It also allows you to filter a mechanical mixture.
Slide38Graduated Cylinder: a precisemeasuring device also used to pour liquids.
Slide39Retort/ Ring Stand: used along witha ring clamp to safely heat liquids when using a bunsen burner.
Slide40Test Tube: Used to conductchemistry with small amounts of chemicals.
Slide41Test Tube Clamp: used to hold a testtube during heating.
Slide42Clamps: Used to hold onto the“neck” of glassware while heating.
Slide43Tongs: used to safely heat solidmaterials.
Slide44The Scientific Method...An organized way to conduct a scientific experiment. There are 6 steps involved.
Slide451. PurposeThe reason(s) for doing the investigation or activity. Eg. To determine how studying effects science grades.
Slide462. HypothesisYour best guess or prediction about the answer to the problem you are trying to solve. Eg. The more you study the better your science grades.
Slide473. MaterialsThe items necessary to carry out the investigation. Eg. Science book watch (for timing) test
Slide484. ProcedureA detailed, step-by-step description of what you are going to do; the method. Eg. 1. Do science test without studying. Take test. Record score. 2. Study 2 hours. Record score. 3. Repeat 3 times and average.
Slide495. Results and ObservationsWhat you learn from doing the experiment using your 5 senses. The results may be given as… statements graphs charts diagrams tables
Slide506. ConclusionYour interpretations of the results. Stating whether your hypothesis was right or wrong. Often times making inferences . (a possible explanation for your observations; it may be right or wrong.)
Slide51Variables and Controls...Located in the Procedure of an experiment.
Slide52Manipulated VariableThe part of the experiment that you change. There can only be ONE in each experiment. Eg. The length of time spent studying science.
Slide53Responding VariableThe result; what happens. Eg. The result on your science test.
Slide54ControlsThe conditions of the experiment that must be kept the same to ensure you are testing what you set out to test. They keep the experiment fair.
Slide55•Person being tested • subject tested • where they study • difficulty of test • where the test is written • health of person
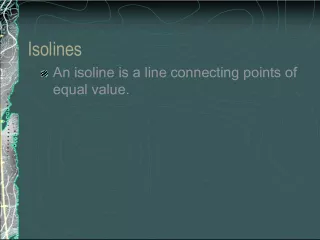
Slide56Graphing...A visual display of data that is easy to read.
Slide57Terms to Know...• Interpolation: determining values between the known points. • Extrapolation: determining values beyond or outside the known points.
Slide58•Origin: the point where the x and y axis intercept. • Range: the difference between the highest and lowest values.
Slide59All you need to know to makean effective graph... MALCOM X MV on the left of a chart; MV on the x-axis of a graph